News:

2box forum: accident-free since the last one.

Main Menu
Menu

Show posts

This section allows you to view all posts made by this member. Note that you can only see posts made in areas you currently have access to.

Show posts Menu

Messages - K3NH

#1
Hi this is to future me.

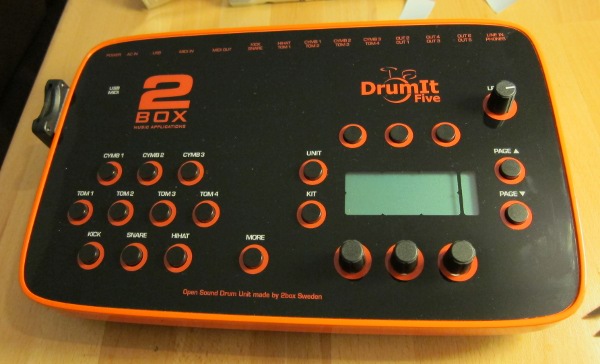
Correct power adaptor for 2box drumit five mark 1 in Europe is:

Input: AC 230V 50Hz 140mA
Ouput: AC 18V 1A*

* probably better to use 0.5A (500mA)?cause the plastic shield is warm. But I've been using for 3 hours straight and never get to a point where I would be worried it's just warm...
#2
Other e-drum systems / Re: Best e-drums in 2022???
April 01, 2024, 09:28:45 AM
Quote from: edcito on April 22, 2022, 11:03:40 AMAn ATV Ad5 is a good option, 4ms latency, nice sounds, compatible with many brands of pads, (not the case with efnote which has a proprietary hihat) and plays nice.

Be aware that you can't edit sounds recording or even using metronome! is not possible through the module. It's sad...
#3
Yes we do! Thank you for your effort.
#4
e-drum DIY / modifications / Re: SD-Card mod step by step
December 20, 2020, 09:22:55 AM
Hi All,

Thanks everybody envolved in this topic. I appreciate your time to shear your wisdom and experience to the rest. This forum Rocks!
Anyway I'd like to shear mine weird experience with doind this mod, so maybe it will bring more positive thinking after you tighten all of your srews sit comfortably and see how the module doesn't read the sd card through the extender after all... I did every step, I was extremaly careful with extender so much i even fold back the casing with a pilers. I was pretty sure that everything is one big success. Until i put original card and find out that it isn't working. No usb mode error appear with no other option than switch off tje module. I straighten up the cable and tried again... Then it worked. I figured out that this is the only position for the extender snake to work with the card. At that time I decided to resign from extender as it seems to be somehow damaged and buy the sdhc lexar 32gb 1000x card and put that card straight to the module... So i bought it and i was not that simple as very little shops had it on sale. I decided to give the last chance for the use of extender. I put the new card to the hub and guess what?.... Everything started to work! I bend the extender snake in almost every position(of course carefully, no more than 90 deg) and the new card was reading without any error, without any delay and it is working till now I did the mod a month ago and played several time with no issues. Why it suddenly started to work with new card rahter than with original one through the extender? Nothing as it seems. Maybe some day we will now. Wish you the same luck!

Cheers

Michal
#5
e-drum DIY / modifications / Re: SD-Card mod step by step
November 15, 2020, 09:19:17 PM
Hi is there any chance to get photos? They appear to be removed

Quote from: Manfred on August 26, 2011, 08:41:48 PM
Hello,

since it is not available anymore at the 2Box-Homepage i thought i post a description how to replace the SD-Card or put in a SD-Card-Extender. I received the SD-Card-Extender this morning and couldn't wait to put it in. Here is the description how i did it which is almost the same that was at the homepage:

Please make sure you disconnect the Unit from the mains power, before beginning any work on the Unit. For ESD reasons avoid touching any components or plated areas or wear an ESD strap. On the housing one can read "Warranty void if opened", so do at your own risk.

Required Tools

- Phillips screwdriver
- Torx screwdriver TX10
- Tool to remove nuts (flat pliers works fine)


Step 1

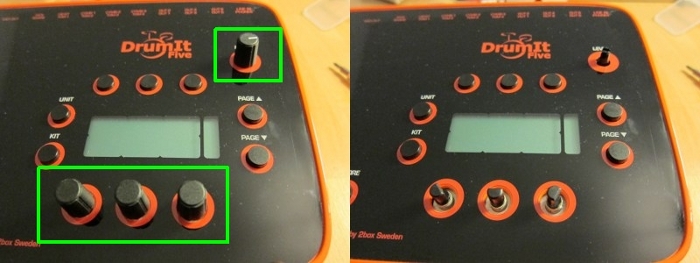
Remove the 3 rotary dial knobs and the level knob from the top panel by pulling them straight up.


Step 2

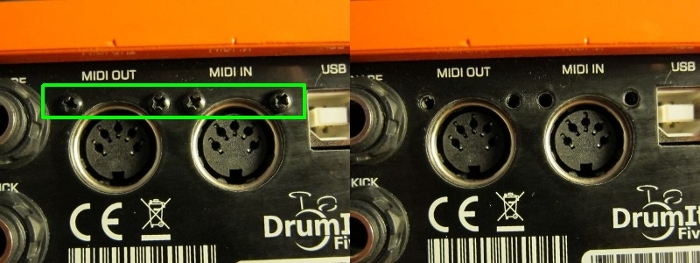
Take the Phillips screwdriver an unscrew the 4 screws on the 2 MIDI sockets.


Step 3

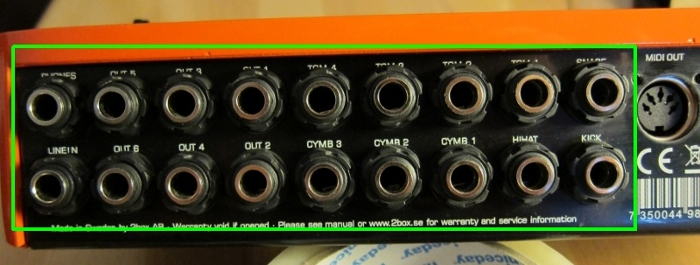
Unscrew and remove the 18 nuts from the jack sockets.


Step 4

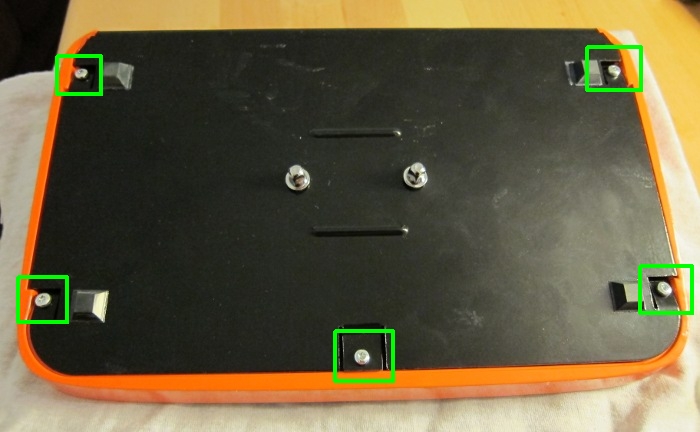
Turn the unit upside down and place it on a soft surface. Unscrew the 5 Torx screws holding the lower lid to the upper orange lid.


Step 5

Gently lift up the front edge of the lower lid and move it down slightly and then backwards to release it from the jack sockets.


Step 6

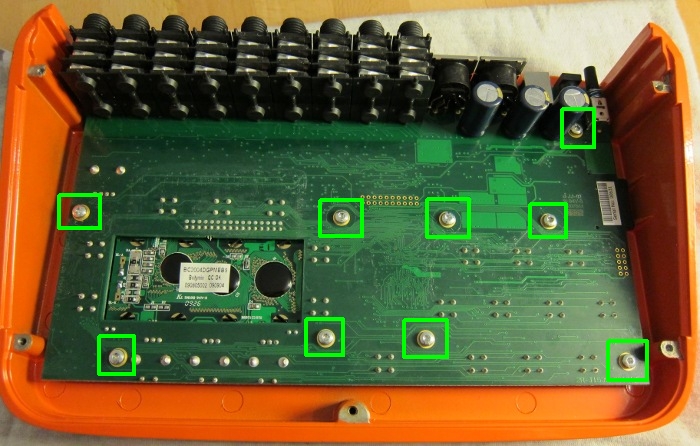
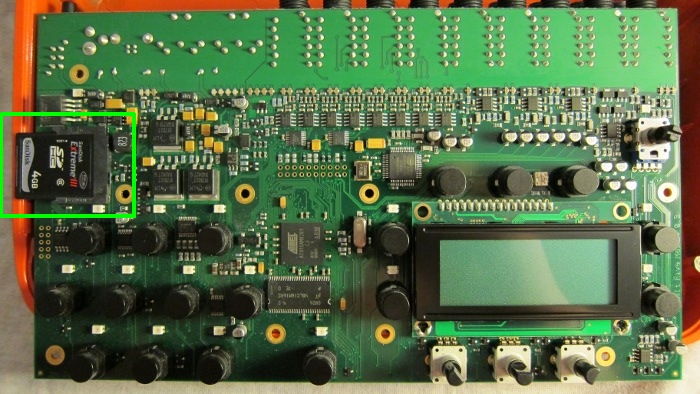
Remove the bottom lid and you will now see the circuit board. Avoid touching any components or plated areas. Remove the 9 screws holding the circuit board to the upper lid. Lift up the circuit board by holding it at the jack sockets and the edges. Locate the SD-card slot holder on the left hand side.


Step 7

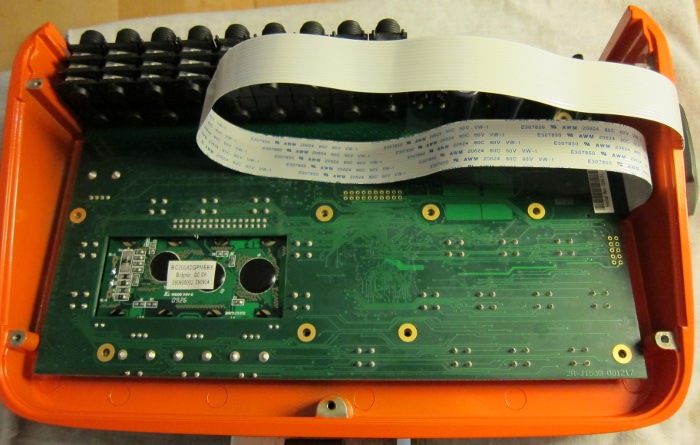
To remove the SD card, ease it out gently from the holder. Now insert your SD-Card-Extender.
WARNING: Be careful to run the flat cable straight out of the module as pictured. If the cable placement is too close to the module corner the cable will be pinched/creased and rendered useless. When placed correctly there is ample room for the cable to slide freely between the module casing and the bottom cover plate.


Step 8

Insert the circuit board back in to position and very gently screw the 9 screws back in to place. There is no need to over tighten the screws. As soon as the screw meets the circuit boards surface you are fine.


Step 9

With the orange lid still upside down, take the lower lid and angle it in to the small recess underneath the jack sockets. Gently pull the front edge towards you and then down to meet the front of the orange metal work, making sure the holes on the lower lid slide over the jack sockets.


Step 10

Gently screw the 5 torx screws back in to position. Again taking care not to over tighten them.


Step 11

Screw all 18 jack socket nuts back on the jack sockets.


Step 12

Screw the 4 MIDI screws back in to place.


Step 13

Turn the unit up again and replace the 3 rotary dial knobs and the level knob. Be aware of the flat marker area inside the knob matching the detent on the shaft.


Step 14

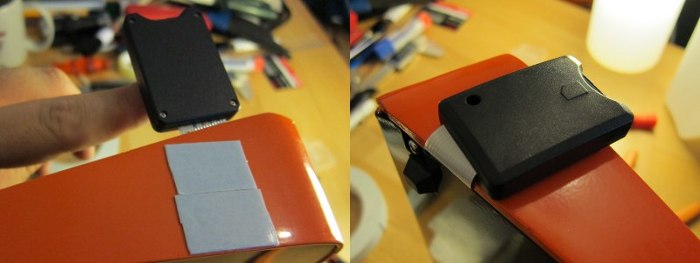
You can use double sided tape to fix card reader on the housing.


Step 15

Insert SD-Card to card reader and test the unit. If everything is okay the unit boots up as normal. If you put in a card with more than 4GB it might take a few seconds more to boot up. To prepare other SD-Cards simply copy operating system, settings-file and sounds from you old card.


Have fun!!
#6
Hi,

Does anyone want to sell used Zourman 42box conversion for 2box five. Please let me know.

Thanks,

Michal
#7
Hi Guys,

Sorry for duplicating threads but it is really hard to fine one straight answer to this question. Below is the question:

Do I really need any additional conversion boxes to use roland fd-8 hihat pedal controller with the 2box drumit three (DI3)? As a reminder it is not a question about drumit five (DI5) and I read latest compatibility list for DI3. I'm still not convinced about no additional expensive conversion boxes needed to play fd-8 (they are mentioning fd-7, but the whole google says you need to have Zourman stuff). Lots of misleading information. :-\

Maybe someone plays on this fd-8 roland with 2box drumt three module configuration and can help.

Thank you for an answer.
Cheers!